background

Pages

Showing posts with label punches. Show all posts

Monday, July 18, 2011

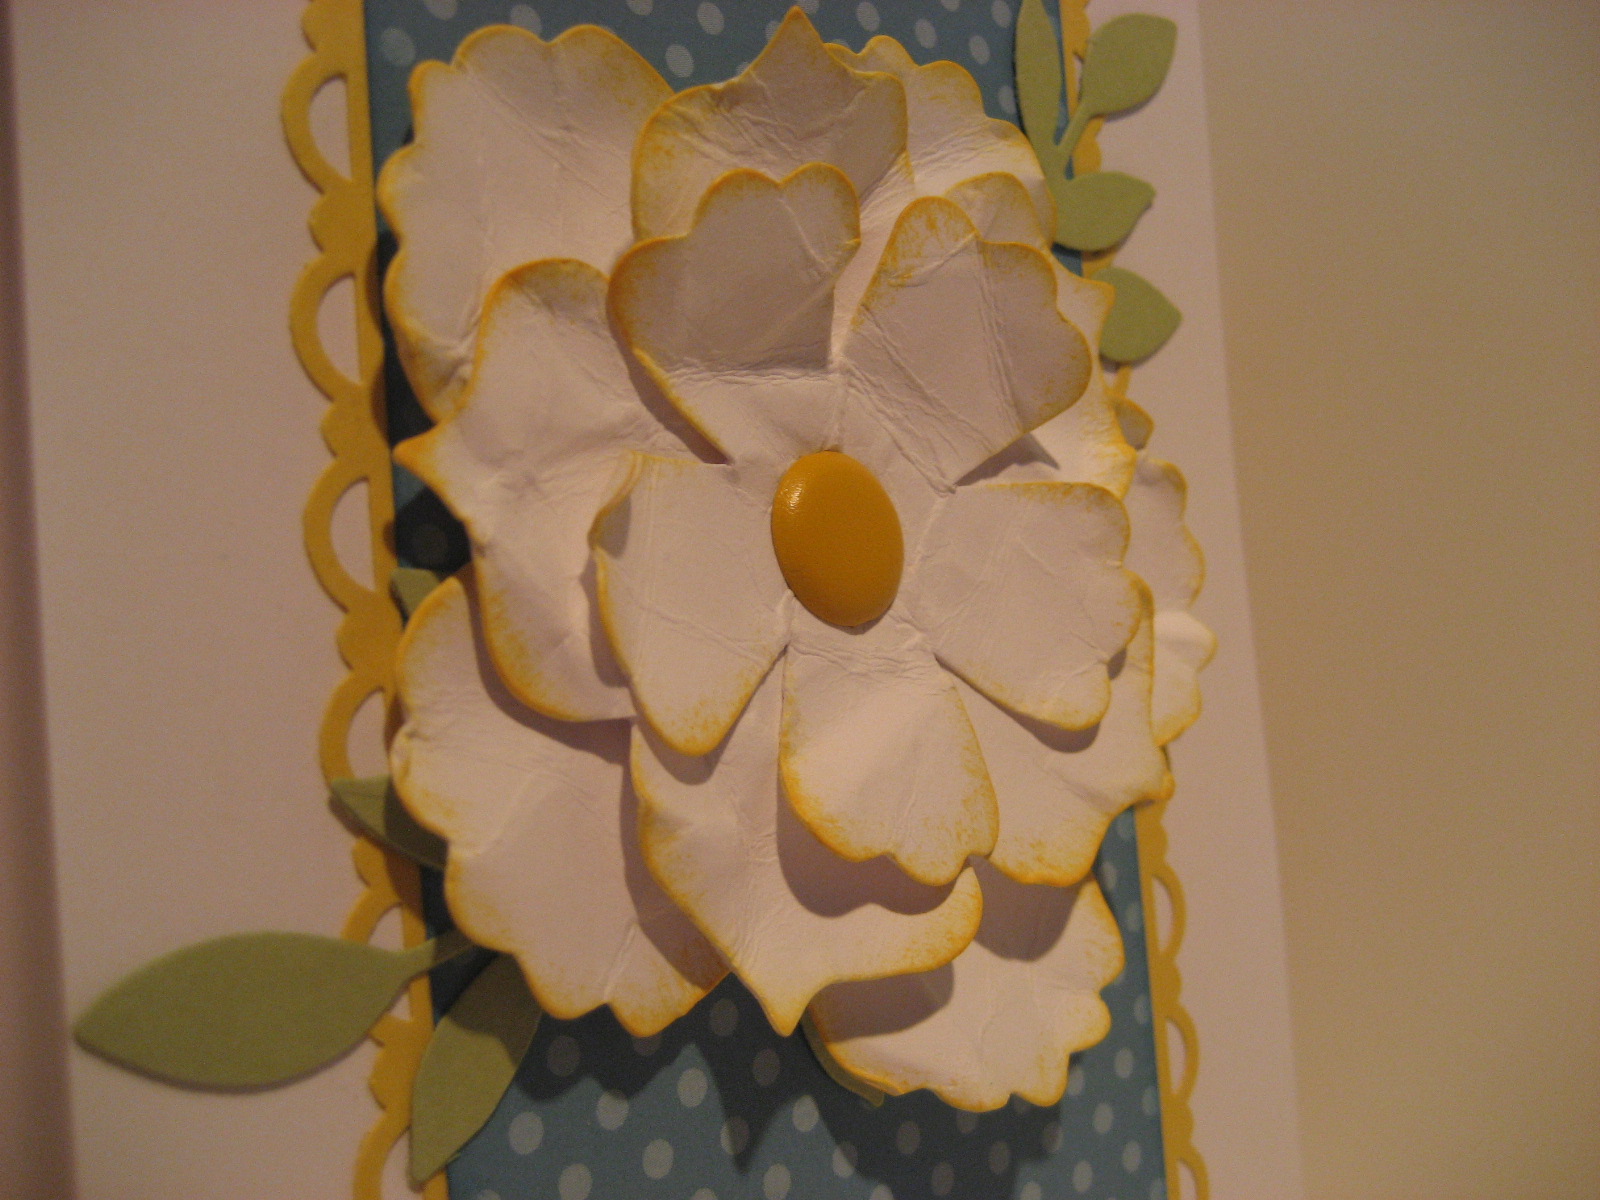
Fun Flowers Birthday Card


Oh, I just LOVE these flower dies! They are so versatile. And this color scheme is one of my favorites. This is a super simple and easy card to assemble and packs a major punch! ;) lol!

I cased this card from this scs example. I love to start with an idea and then make it my own.

Supplies used:

Big Shot Die-cutting machine 113439
Fun Flowers Bigz Dies 121812
Little Leaves Sizzlits Dies 114511
Subtles Paper Stack 117152
Daffodil Delight Card stock 119683
Scallop Trim Border Punch 118402
Word Window Punch 119857
Modern Label Punch 119849

CTMH Annotations (happy birthday) stamp set

Thanks so much for stopping by today! ;)

Thursday, July 14, 2011

CIC #31 Punches, Die Cuts, Cut Outs


I am entering this fun little number in the Clear Dollar Stamps Clearly Inspired Challenge. It's been a LONG time since I have entered any challenges. But I'm planning to do it more often.


For this card I used 3 different punches, all from Stampin' Up! The new Triple Layer Punch, Blossom Bouquet is fun to play with and layer colors.

Then I used the Dotted Scallop Ribbon Boarder instead of ribbon. Fun and a different touch for me. And finally I used the now discontinued Designer Label.

Thanks for stopping by! Blessings to you today!

Wednesday, July 6, 2011

You Always Do The Nicest Things


This is one of the new stamp sets in the Summer Mini catalog ~ Happy Greetings. I really like this set. The sentiment sizes are great for making a focal point on your cards.


I also used one of my favorite punches ~ Decorative Label. See, look how great these sentiments work with this punch! That's my favorite thing about Stampin' UP! ~ stamps and coordinating punches! Sooo Fun! ;)


Now, this paper is discontinued, sorry. But I still have some left and I love these color combo's. And of course you can copy this layout with any color scheme!


Thanks for stopping by! Blessings to you! And as always you can leave me love by leaving a comment! ;)

Thursday, June 9, 2011


Oh I just think this card is scrumptious! I was reminded of that word on Sesame Street recently. Gotta love having kids! ;) Anyway, I think that word describes this card wonderfully! This houndstooth paper is SU from the Night and Day paper pack, and it's being discontinued so hurry quick to get yours! The ribbon I just have in my stash and don't remember where I got it from. The large butterfly is from PaperTreyInk, one of their dies. And the small butterfly is from the Martha Stewart punch. The sentiment stamp is from SU from Sincere Salutations.


Thanks for checking in today! Blessings to you!

Sunday, March 20, 2011

St. Patrick's Pots of Gold


I just wanted to share these very fun little 'Pots of Gold' I gave out to my boys' teachers and all my neighbors.

These are so sweet and lots of fun to make. I painted a 3" terra cotta pot with black craft paint and then did a 2nd coat with a metallic black to give it a bit of a shine. Don't you think the Leprechauns pots of gold have some shine to them? I think they must. ;)


Then I hot glued some random different green ribbons to the rim and added a button shamrock and a little tag that I created with The Print Shop.


Inside is some gold shredded paper filler and 3 gold hershey's nuggets and a chocolate gold coin. Are you aware that it is darn HARD to find those silly gold coin candies!!?? I went to 8 stores not to mention, the dozen that I looked at on line to find them! That is a little obsessed I know, but the pots HAD to have gold coins!! ;)


I wrapped them up in cellophane a tied them with a sweet Irish Blessing that I found online. My kiddo's had a lot of fun handing these out to their teachers and knocking on ALL the (18) neighbor's doors to wish them Happy St. Patrick's Day. That's the best part. It's so fun for me to make these little goodies and then it's so fun to surprise people and give them a little something that they totally didn't expect!


Thanks for checking in with me today and May God bless you and fill your home and heart with gladness and cheer! ;)

Oh ~ I'll be posting my April class soon so keep checking back!

Thursday, January 27, 2011

February Workshop ~ Featuring the Decor Accents Blocks


These little blocks are so cute when decorated! Instead of stamp clubs for February I'm offering this workshop. We will be decorating these blocks with 4 different themes. And get to try and play with with lots of different products!


This workshop will be held at my house on Friday, February 11th at 7 pm. Cost is $20 and includes all your supplies and a lite snack. Please email me if you'd like to sign up. Space is limited.

Wednesday, January 5, 2011

January Blessings On Paper


We are making these 4 beautiful and fun greeting cards! All supplies are from the new Stampin Up! Occasions Mini Catalog that just started on January 4th! So many fun new collections to sample! I love the chocolate set! ha ha ha!

The cost is $8 and everything will be supplied there for you! If you haven't signed up yet, please send me an email and let me know if you're coming!

This card is made using the Bold Blossom stamp set. The butterfly and blossoms are so adorable. Although you may get tired of me by the end of the evening making you cut these all out by hand! ;) And the so saffron taffeta ribbon, yummy. ;)

Same with this one. I also added a glitter brad, lovely. And I used the Designer Buttons ~ Subtles collection. Oh these are amazing!

This is the Eat Chocolate stamp set. Too fun! I also added some liquid glass to the chocolates to make them look even yummy-er and I sprayed the Rose Red card stock (after embossing) with some homemade glitter spritz. I love that effect.

And this card just makes me laugh. It is SO me. lol! I am a list person and a chocolate person and having 3 young kiddo's sometimes this is how I feel. ;)

This Friday night class will be so much fun. I absolutely LOVE all my ladies that attend. See ya Friday!

Monday, January 3, 2011

Adjustments to My Happy Place


Okay so most of you know that My Happy Place is still in the very new stages. So that means that I will have tweaking and adjusting to do as I figure out the best way for everything to function in here. ;) And I like to SHARE those processes! lol! Things are really starting to fill in here. ;) Just ignore the right hand side, like from the end of the desk and over, I'll fill you in on that area another day. ;)

In my last photos of my room this section of wall was still pretty blank. So I've added a couple extra towel bars and the picture ledge with frames. Everything seems to really fit in place nicely and flows well.


Looky ~ looky! I am so excited about this! Okay so you know I am a new Stampin Up! demonstrator. Well I am not one that already has a collection of SU ink pads. I had previously really only had Close To My Heart ink pads, which I loved the way that I stored them and kept them so handy with the Ikea shower caddy's and towel bars. Now switching over to having SU ink pads, well...they don't fit the same way! And I don't really want a bulky ink pad tower on my desk. So look what I came up with!! It's the same Ikea shower caddy's I just turned them on their side! They still can hang from the towel bars and then I just (get this!!) twist tied the two caddy's together and just hung the top one from the towel bar. he he he! Each caddy can easily hold 8-10 ink pads, although keeping it to 8 is much more accessible. And I can just keep adding extra caddy's as my collection of ink pads increases. The caddy's are $1.99 and so is the towel bar. Pretty cheap!


In this picture you can really see the difference in how the two types of ink pads store in these caddy's. Also you can see that I keep my scrubber and spray handy in the top tray. My sponges are right next to that in the white hanging bowl. And next to the SU ink pads are my clear blocks. Everything within reach, in view and so accessible for all my stamping projects. You can see too that I hang my heat gun on a hook here and it is always ready when I need it. I really am a person who likes things in one room, everything in one place and within reach when I am organizing. I don't like to have to keep getting up to get something from somewhere else. ;)

This part is so much fun! I got this chunky frame and decor element in the bundle with the last Stampin Up! promotion and I love the way that it looks! I just haven't decided if I want a color or black and white picture in it yet. ;) And the Ikea frame next to it ~ they just totally look like they go together. Love it. Also the picture ledge is from Ikea too.

I think I'm gonna call this my 'Paper Manipulation Station'. lol! This is still one of my favorite finds. Purchased from Craigslist last year, it is such a nice piece of furniture and it really functions well for crafting. It's almost counter height so it's awesome for all my paper cutting, scoring, embossing and punching.

A bit of glare here, but more true to color for the wood of this piece. ;)

I LOVE having all my punches up now and I can see all of them in one place.


In the bottom right hand side cubby I use this large accordion file to store all my scrap paper. I love this system. It is organized just by color, so whenever I need a piece of red paper I can just go through that first before I start cutting anymore full sheets. Especially when I just need a bit of paper for a punch, it's really nice to have that handy. Also in that big green box is all my 'stuff' that I use with my Cuttlebug. Keeps everything within reach.

Thank you so much for checking in with me and my progress with My Happy Place. This has been such a joy for me and it's so much fun to share!

Have a blessed day!